6.20.2012

Golf Ball Caddy

So you're on the back nine and you slice your drive shot right into the water hazard to the right of the green. You've lost another ball to the out-of-bounds-gods. And you won't be getting it back (especially because of the sleepy gator who just swallowed it).

I know, the imagery is a astounding.

Anyway, you need a new ball. And you dread the risky venture into the deep side pouches of your golf bag, riddled with sharp tees and who knows what else. Ouch!

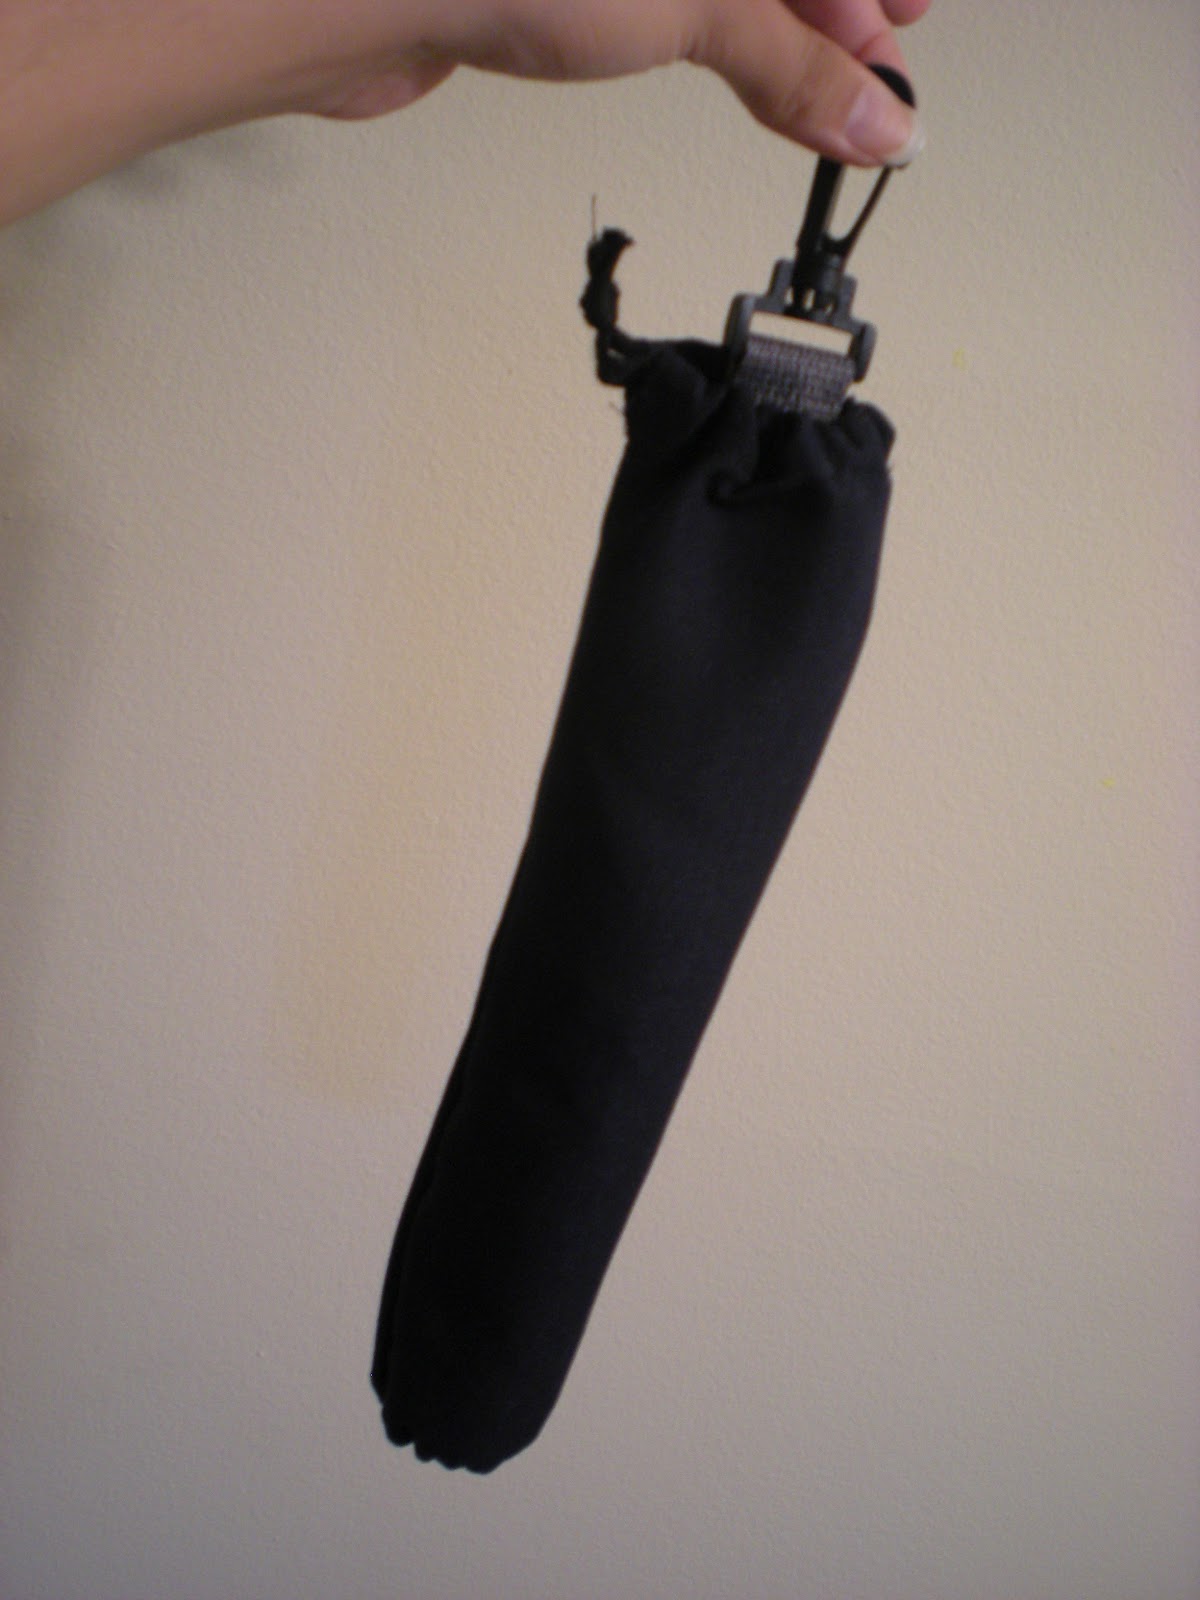
So you turn to your GOLF BALL CADDY!


I like to call it "the ball booper" because this genius idea allows you to squeeze above a new ball and "BOOP!" A new ball!

This makes a wonderful gift for Father's Day or a birthday/graduation/holiday of your favorite golf players.

Original directions were brought to me from Pinterest, of course.

Materials:
  • Woven fabric 
  • Elastic string
  • Cord or shoelace
  • Sewing machine and such!
  • Plastic hook
  • Strap material
  • Golf balls! (six)
Instructions

1. Cut your fabric! 13 x 6 1/2 inches of the woven fabric is perfect for six golf balls.


Your cord or shoelace should be cut to 9 inches.


And you elastic, 6 inches.


2. Using a zigzag stitch prevent raveling on the two long edges of your woven fabric.


3. Fold over the two short edges twice to form a pocket of about 1/4".


4. Sew the two long edges together, but don't sew to close the pockets (You'll have to thread cord and elastic through them).


5. Attach the hook with the strapping. Again, make sure that you don't sew over the pocket part (that would make the next steps more difficult)


6. Thread the elastic through the bottom pocket (opposite the hook). Stretch the elastic so that a golf ball will fit through the opening, but actually stay in there. Sew it closed and trim it.


7. Now thread the cord or shoelace through the top (by the hook). Tie a knot in the end so it will stay. You should be able to cinch the top closed.


8. Fill your golf ball caddy/ ball booper with six golf balls.


Now, when you need a ball...


BOOP!! New ball.


You're ready to go in style and practicality. 


6.11.2012

Picnic Blanket

It's SUMMER TIME!!! I love to be outside in the summer and some of my favorite activities are outdoor concerts and plays. My sister lives in the Windy City, which is full of outdoorsy things and parks. And with her birthday approaching (and now passed... I get so busy), I decided to build her a picnic. Kinda...


This portable picnic paradise platform was inspired and directed by Fabric-by-Fabric One Yard Wonders.

Materials:

  •  One yard of home deco fabric (It was the end of a bolt, so I got a little extra. But I figured, it's a big rectangle so it shouldn't matter)
  • Sewing machine and materials
  • Rolator cutter and mat
  • 3 buttons that match
Instructions:

1.   Cut your fabric. (My measurements are based on one yard of fabric, but if you end up with more fabric, like I did, you can make necessary adjustments.
  • Flap: 36" x 6
  • Pocket 36" x 7
  • Blanket: whatever is left :)


2. Hem three sides of the blanket. Don't hem one of the 36" ends.


3. Do the same with the pocket. (Hem three sides, except for one of the 36" sides).


4. Align the non-hemmed edges and pin the right side of the pocket to the wrong side of the blanket. Stitch along the raw edge.


It will look like this on the other side once it's sewn together and opened up.


5. Flip the pocket up onto the right side of the blanket so that the wrong side of the pocket is on the right side of the blanket. Pin it.


6. Sew it.


7. Mark the pockets to make divisions that work for your plates and utensils. I just made it simple and did four equal divisions and then divided the two middle divisions in two again (wait... what? so i ended up with two big pockets on the ends and four small pockets in the middle. Sew along your drawn divisions


 POCKETS!
TO PUT THINGS IN!!

8. Now the flap. Hem the short ends and one of the long ends. For the unfinished 36" side, fold and press over 1/4" (Don't sew it yet!)


9. Buttonhole time!! This was scary for me because I have never done it before. But I survived it! My sewing machine has this crazy cool automatic buttonhole maker. You put on the buttonhole foot and then put your button in the back of it and then hit the pedal and MAGIC!!


Sew buttonholes evenly spaced on the flap, one in the middle and two on the edges. Make them 1" above the "bottom of the flap" (the longer hemmed edge). Allow Sully to demonstrate.


10. Line up the flap on the picnic blanket, 10" from the bottom.


11. Pin it!


12. Sew it!


LOOK A FLAP!


LOOK A CAT!


PEEK-A-BOO PLATES!


13. Attach your buttons so they line up with the buttonholes.


(That cat would not leave me alone!)

14. Fill your pockets with plates and utensils.


15. Button and fold it up!!


16. Take it outside!!


17. ENJOY YOUR PICNIC!


I got these fabulous plates and made these napkins myself!!


Picnic Picnic Picnic Picnic Picnic Picnic  Picnic Picnic Picnic  Picnic Picnic Picnic  Picnic Picnic Picnic